Setup an email account in Outlook 2013 website tutorial
- Open Microsoft Outlook 2013
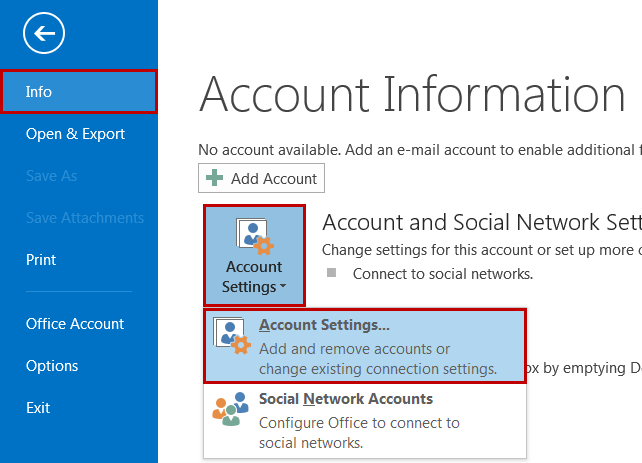
- Click File
- Click Info from the left side menu
- Click Account Settings
- Select the Account Settings...option from the drop down
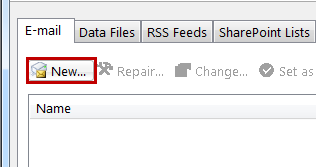
- Under the Email tab, click New
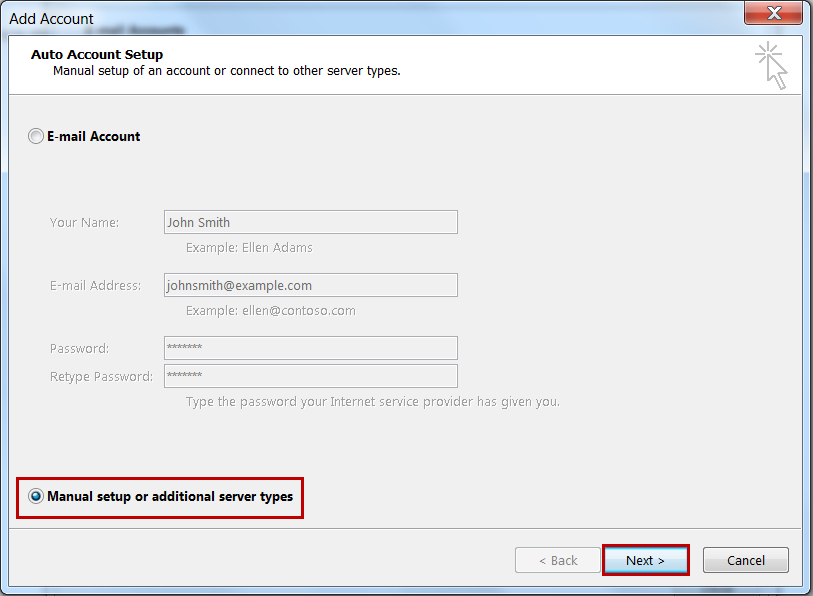
- Select the Manually configure server settings or additional server types radio option then click [Next]
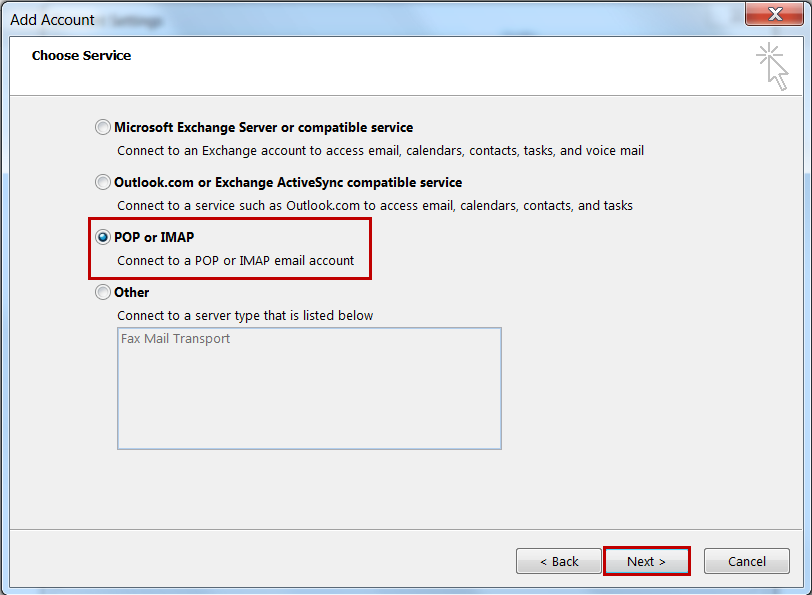
- Select the POP or IMAP option and click [Next]
- Complete the empty fields:
Your Name: The name you wish displayed when people receive your emails
Email Address: The email address you are sending email from
Account Type: Select POP3 or IMAP from the drop down
Incoming mail server: mail.example.com where example.com is your domain name
Outgoing mail server: mail.example.com where example.com is your domain name or you can enter your Internet Service Provider’s (ISP) outgoing mail server
User Name: Your full email address. eg. johnsmith@example.com
Password: The password used for this email account
It is up to the end user to decide if they want to create a new Outlook Data File or not, this choice does not affect the connection to our servers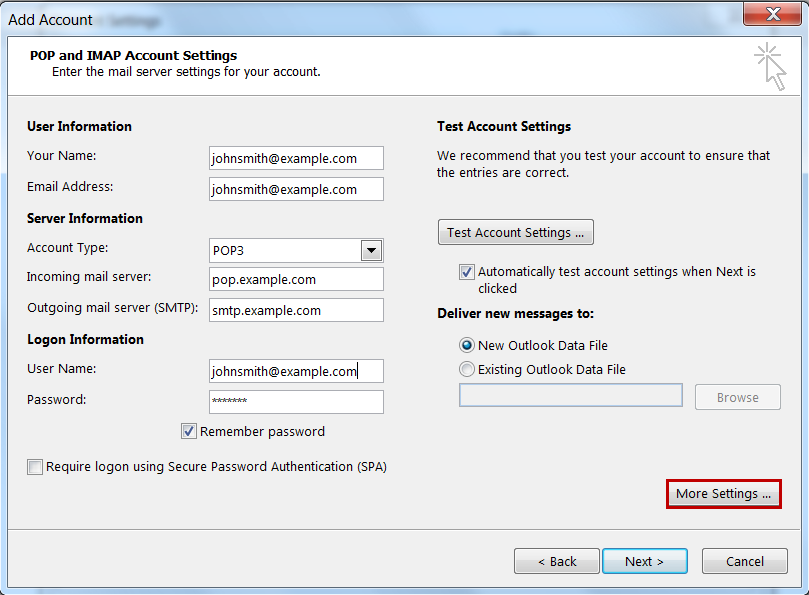
- Click [More Settings]
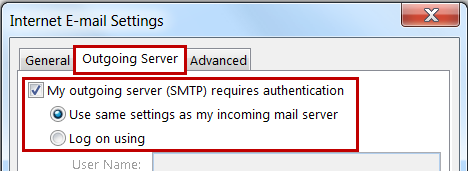
- Select the Outgoing Server tab
- Select My outgoing mail sever (SMTP) requires authentication and Use same settings as incoming mail server
- Select the Advanced tab.
Users can choose whether to use SSL or not, both are supported on our servers
Without SSL Encryption
This server requires an encrypted connection (SSL) = Unselected
Change the Outgoing server (SMTP) number to 25
Use the following type of encrypted connection = None
With SSL Encryption
This server requires an encrypted connection (SSL) = Selected
Change the Outgoing server (SMTP) number to 465
Use the following type of encrypted connection = SSL - Click [OK]
- Click [Next] then [Finish]
